I'm dusting off an old CD here, and showing off my first work with Photoshop. This was the project that 10 years ago convinced me I needed a digital darkroom.
Here are two pictures from an early Photo CD. This was one of the first Photo CD's ever made. Kodak announced, and I decided to see what they could do with a couple rolls of film I had just shot.
These are what I call vacation quality pictures. They are nice, but neither is dramatic, and both need words to finish the story.
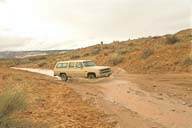
The first picture is crossing a dry creek bed on the Burr Trail. At least, it's supposed to be dry. But rain has been falling in the mountains and this creek had water in it. Marty and I were worried that flashfloods might come roaring down one of these creeks the same time we were. We found out later that flashfloods are a summer hazard associated with thunderstorm cloudbursts; but it was a winter drizzle was filling these creeks, car-swallowing mud holes were a possibility, but flashfloods were out.
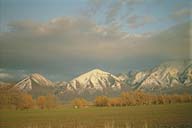
The second picture is the Wasatch mountains viewed from across Utah lake on a warm spring afternoon. The Wasatch are a geological curiousity: they have no foothills. This makes them some of the world's most photogenic mountains. They look like "real mountains" from close or from far away. This shot is about 100 miles north of the first shot and taken a month later.
Both these pictures are nice, but they lack drama. The first shot has action, but the red rock is drab, the sky a boring white, and the high mountains surrounding this creek bed show up as only a narrow purple strip behind the car. The second shot has nice sky and nice mountains, but the foreground is dull and the overall colors are drab. Lets use Photoshop to put them together and enhance the color ranges of each shot. Here's what we get:
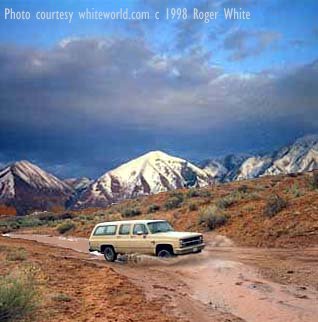
Wow! My eyes bugged out as I watched this shot form up! Here's real action, real mountains, real red rock, and real great sky all in one picture. It took me two days of experimenting to build this picture the first time. Now that I know Photoshop better, it took about a half hour to recreate it. This is why I want to do more digital darkroom work!
Here's another example from the same CD.
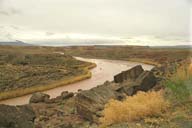
This first shot is halfway between Capitol Reef National Park and Hanksville Utah. The river is winding through some interesting rock formations, but it's flood stage muddy, and once again, the sky is featureless white. Lets grab my favorite mountain shot from this CD and see what we can come up with...

Nothing like some mountains reflecting in water to dress up a landscape picture.
The reflection is simply cutting and pasting the mountain shot to make a second copy, then flipping the copy over on it's back. The copy is also not enhanced, and brightened a step. The rocks are darkened a step. These actions are handled through layers in Photoshop. This image has three: the mountain layer, the reflection layer and the rocks layer. I cut the sky and river out of the rocks layer to let the other two layers show through.
Another important lesson in this series is how important sky is to landscape shooting. Sky is one third to two thirds of the picture, so most landscapes are really skyscapes in reality. Have a library of nice skies that you can add to pictures with interesting foregrounds and midgrounds.
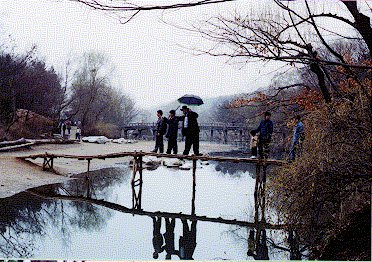
This lesson is using Photoshop to recover from a mistake. This was a shot I took at Korean Folk Village, outside Suwon, Korea.
I envisioned this shot, but I'm the big guy on the end with the umbrella. A passing by Korean was nice enough to shoot this picture for me. Unfortunately, he didn't see quite the same picture I did. I saw reflections in the water as well as people on the bridge. Not too hard to fix...
I started with the same "mirror copy" that I did with the river picture. It was a little tricker this time since the mirror was not starting from the horizon and running clear to the top. After mirroring in the image I used "rubber stamp" to smudge the line between real water and mirror water and to take out some distracting branches.
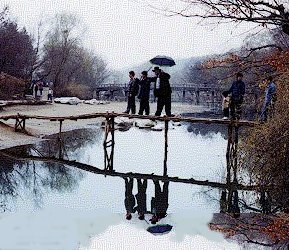
Notice also that the image doesn't have to be perfect to "work"--to produce an appropriate impact: the people on the right waiting their turn have their heads cut off in the water reflection. It's not something you notice the first or second time you look at the picture, so I saved myself some time by not fixing it.
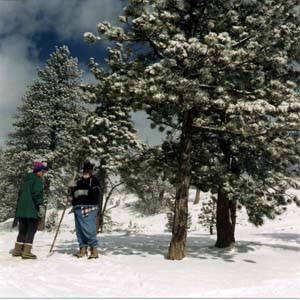
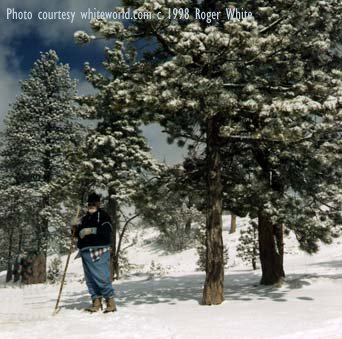
Here's another example of disappearing people. The lady on the right may be scintillating in person, but she's not adding to this photo. So... poof! The old man is now alone. This is done using the "rubber stamp" tool. You replace a small part of the image with some other part of the image. In this case, I simply filled the lady in with more tree image from either side of her. I also straightened up the trees by rotating the whole picture.
That's all I've got for you today. I hope you've enjoyed it.